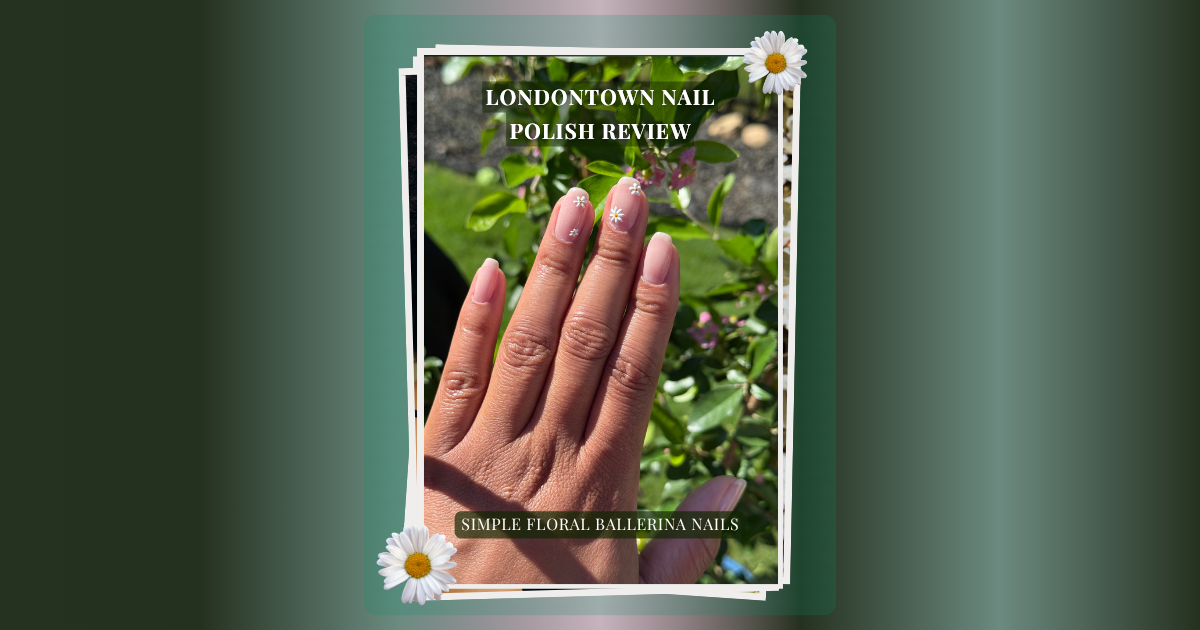
Londontown Nail Polish Review: How I Created These Simple Floral Ballerina Nails
Hey there! I’m back with another DIY post.
Recently, I’ve been focusing on transitioning from planning projects and ideas to actually executing them. Execution isn’t my strong suit; I tend to overplan to the point of feeling overwhelmed and ultimately taking no action. However, while working on my latest project, I felt a sudden urge to sketch. I had a concept in my mind that I really wanted to bring to life. Now, as far as efficiency is concerned, this project could’ve done without the sketch. However, I found the process to be rewarding and beneficial in many ways.
I genuinely find it exciting to bring an idea to life for others to see and interact with. Pausing to do the design was time consuming and again probably not the best use of my time considering all the tasks that needed to be completed. However, I think overall it was helpful in shifting my mindset and boosting my motivation. It was tedious but I enjoyed every minute of it. I didn’t have to drag myself to my desk to work on it. I was happy to work on it every free moment I had. Ideally, this is what I wish for all my endeavors to feel like.
The Creative Spark I Needed
After finishing the project, I was happy to have simply completed yet another task. Hopefully, it will ultimately contribute to my growth and pursuit of the path I wish to take in my career. Also, I was left feeling excited and inspired to create in other ways. It felt like a little jumpstart, which I suppose I need more often than I realize.
It’s getting sunnier outside, and my energy is starting to match it. Like many others, my energy and motivation ebb and flow. Therefore, when it ebbs, many things go with it. Therefore, I struggle to maintain the bare minimum of most things. When it flows like it is now, I feel inspired to move, create, see, be seen, and focus that extra energy where it’s needed most.
A Much-Needed Pause
While my to-do list seems never-ending, I know I also need to make sure I support the person struggling to complete it. As I mentioned, when my energy is low, self-care can be a struggle. Therefore, with this newly acquired burst of energy, I decided to give myself a much-needed manicure and pedicure.
To do this, of course, I planned it. I already have my favorite content creators and platforms I reference for information and ideas. I am constantly inspired by other creators on YouTube and Pinterest, so I went back to some of my favorite discoveries and gathered what I had at home to try to recreate them.
Disclosure: This post contains affiliate links. If you make a purchase through these links, I may earn a small commission at no additional cost to you. As an Amazon Associate, I earn from qualifying purchases.
The Inspiration Behind This Look
On YouTube, one of my favorite content creators for self-care is abetweene. She shares a lot of valuable information, and her videos are so soothing. I watched one of her “at-home maintenance” videos and followed along for the overall grooming of my nails.
On Pinterest, one of the ideas I’d been wanting to try was soap nails. There are other names and creative takes on it, but ultimately it’s a natural, barely there look, typically translucent pink or milky nude with a glossy finish. I have also seen some take it a step further and add a delicate flower design.
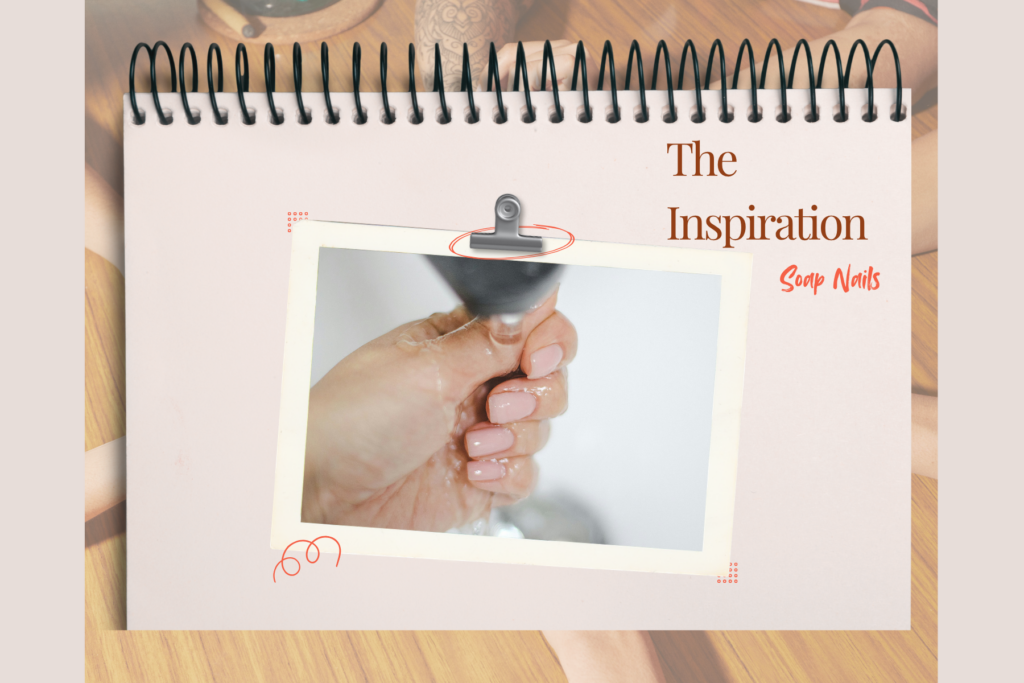
I like soap nails for several reasons but mostly because it’s simple, classy and low maintenance. The color is faint enough not to be unappealing if it starts to fade or chip which means I can keep it a little longer than a bolder color.
I tried this style in the past using the Memeda gel nail polish from Amazon in the color Nude 3. I loved it, and I got a lot of compliments. However, as my nail condition began to change, I had to focus on the health of my nails.
When My Nails Started Changing
In recent years, my nails have taken a turn for the worse due to my iron levels being overlooked (more on that in another post). Ultimately, my fingernails and toenails started developing vertical lines and became thinner, splitting, breaking, and finally spooning. Therefore, as my nails grew, I would have to cut them immediately because of their compromised state.
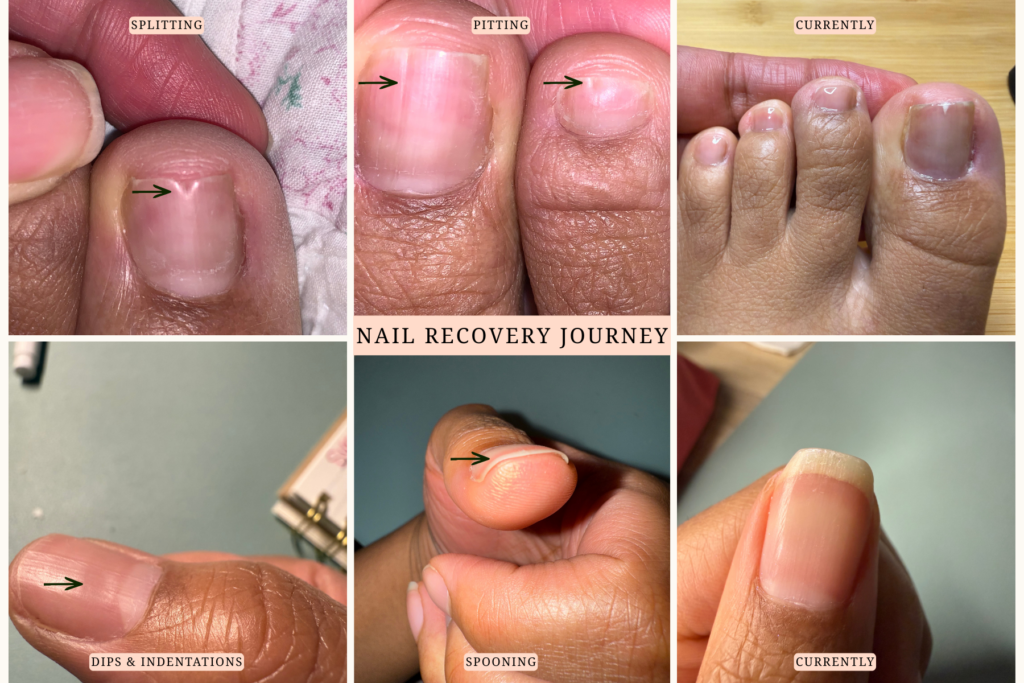
I had to change the way I approached the maintenance of my nails.
I had already reduced my visits to nail salons for convenience and because I couldn’t find a shop or technician that I loved. However, it turned out to be for the best since my nail beds were extremely sensitive. As a result, I committed to doing everything at home.
I stopped using gel polish, nail polish strips, and harsh chemicals because certain polishes would literally make my nails sting. For a short period of time, I was able to do gel at home, but my nails got so bad that I couldn’t even tolerate the UV light.
I also needed to focus on keeping my nails moisturized. As I mentioned in my previous post, I have dry, sensitive skin, and I often think of my nails as an extension of that.
Nonetheless, I love a good DIY and a challenge, so I wasn’t too upset by having to do things myself (it’s sometimes more convenient and affordable). I have everything I need at home and a decent collection to get the job done.
My nails have been slowly recovering, and recently I noticed that, surprisingly, they grew back pretty quickly after I cut them not too long ago. I typically keep them shorter for convenience and to keep them healthy, as they tend to chip and split easily.
A Better Approach to Nail Care
Overall, I try to pay attention to the ingredients in the products I use or consume, not opting for perfection but for improvement. While I haven’t found alternatives for everything because not everything I find works for me, ultimately, I continue to try to do my best. I know some products require a little time, effort, and creativity to work.
Over the years I’ve found several brands of “clean” polishes and of course some of them are better than others. My absolute favorite to date is Londontown Kur polish.
Their polish has been integral to supporting my nails when they’ve been at their absolute worst. I have continued purchasing from them, creating a nice collection.
Get Well Nail Recovery
One of my favorite products from their Nail Care collection is Get Well Nail Recovery because it’s specifically designed for brittle, peeling nails like mine.
It contains AHAs, biotin, iron, vitamin B5, vitamin C, and Florium Complex.
While it is intended for use as a treatment system, it can also be worn as a base coat under other nail products.
As I mentioned, the Get Well Nail Recovery has worked amazingly for my nails, but Londontown offers several other products designed to address some of the most common nail concerns.
The creators of this brand developed the Florium Complex, which I believe is an important reason why their products work so well. This proprietary blend of botanical oils, flower extracts, antioxidants, and vitamins is designed to support nail health while providing beautiful color.
Rather than functioning solely as polish, these formulas incorporate ingredients intended to help hydrate, condition, and strengthen nails with continued use.
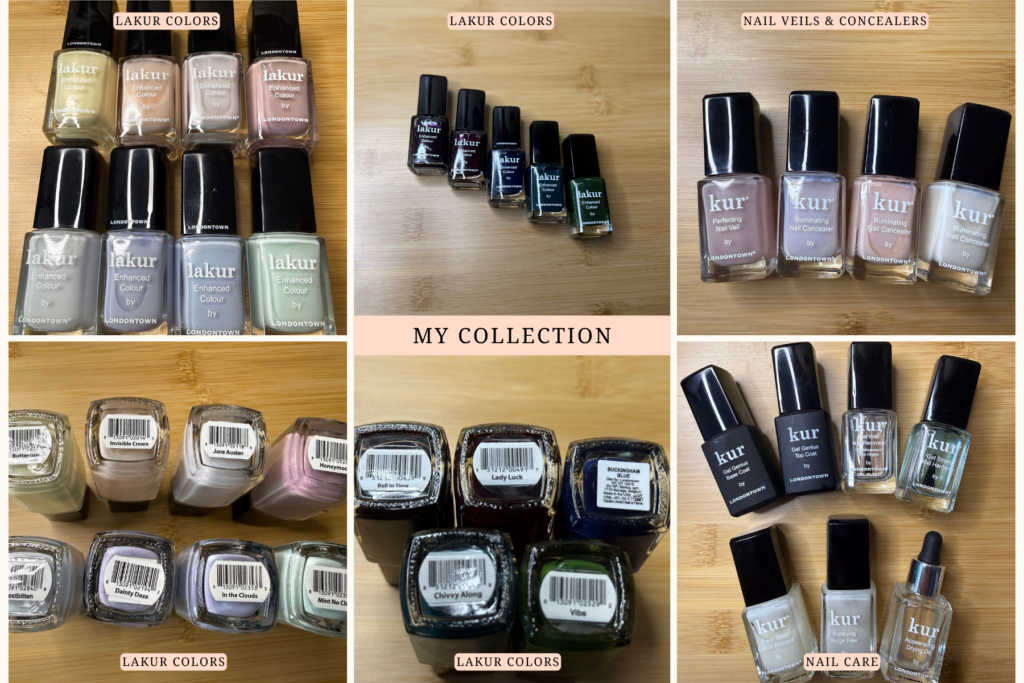
Illuminating Nail Concealers & Perfecting Nail Veils
Some of my other favorite products are the Illuminating Nail Concealers and Perfecting Nail Veils.
The Illuminating Nail Concealers function much like a color corrector for nails, helping to neutralize discoloration, blur imperfections, and create a brighter, healthier-looking nail appearance.
The Perfecting Nail Veils take a slightly different approach, providing an ultra-sheer tint that enhances the natural nail while delivering many of the same conditioning and strengthening benefits.
For this DIY, I used their Fresh Glow Cuticle Remover, Get Well Nail Recovery, Perfecting Nail Veil #4, Gel Genius Top Coat, Accelerating Drying Oil, and flower nail stickers from Amazon.
How I Recreated This Floral Soap Nail Look
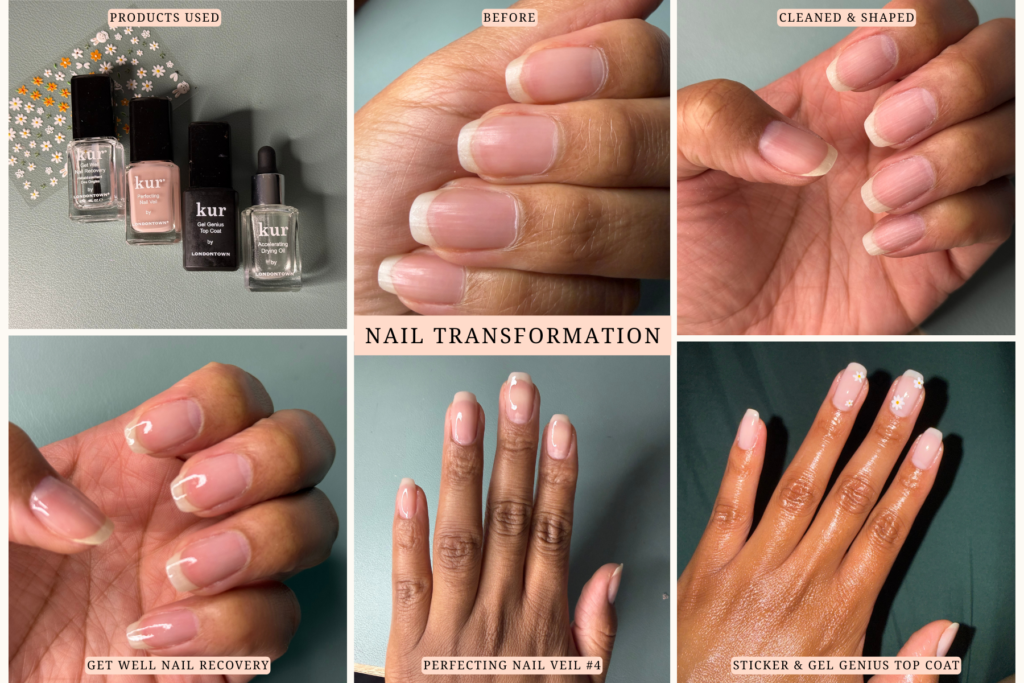
Step 1: Prep the Cuticles
I started with clean, bare nails and applied the Fresh Glow Cuticle Remover. I let it sit for a few minutes while I watched a show, then used the Glass Cuticle Pusher to gently push back my cuticles. After rinsing off the remover, I cleaned up any remaining hangnails and excess cuticle that hadn’t lifted during the process.
Step 2: Shape the Nails
Next, I shaped my nails starting with a rough nail file 100/180 grit and finishing with a glass nail file for a smoother finish.
Step 3: Apply Get Well Nail Recovery
Once my nails were prepped, I applied one coat of Get Well Nail Recovery. I found that a single coat was all I needed, and it dried fairly quickly.
Step 4: Create the Soap Nail Base
After that, I applied two coats of Perfecting Nail Veil No. 4 to create the soft, natural-looking color close to the soap nail aesthetic I was going for.
Step 5: Add the Floral Accent
When the polish was dry, I added a floral nail sticker from Amazon as an accent.
Step 6: Seal Everything In
To seal everything in and add shine, I finished with Gel Genius Top Coat.
Step 7: Speed Up Dry Time
As a final step, I applied the Accelerating Drying Oil. If you’re anything like me and tend to smudge your nails by trying to do things too soon, this step is worth it. It helped my manicure dry faster and let me get back to my day without worrying about ruining my freshly painted nails.
More Than Just a Manicure
I love how my nails turned out, and it’s a nice change from my usual basic routine.
For a long time, I kept things as simple as possible while my nails were healing. Instead of focusing on nail art or trying new looks, I was more concerned with improving the overall condition of my nails and addressing some of the issues I had been experiencing.
Now that I’m seeing positive changes, it’s inspiring me to branch out a little and experiment with different styles again. While this floral design is still fairly simple, it feels like a small step toward enjoying my nails instead of constantly worrying about them.
At this point, I plan to continue using products from Londontown’s Nail Care area and Lakur collections because they fit my current lifestyle. The formulas are easy to use, my nails seem to tolerate them well, and they help me achieve a polished, put-together look without taking much time or effort.
While the brand offers other options, including gel products, I’ll probably stick with their traditional nail lacquers and nail care products for now, as I continue to focus on my overall health and nail recovery journey.
If you’ve tried any Londontown products, I’d love to hear about your experience. And if there are any colors or nail looks from the products I already own that you’d like to see featured in a future post, let me know in the comments.
Also, if you’re interested in another product that has become a staple in my self-care routine, be sure to check out my post Prequel’s Urea Advanced Relief Moisturizing Milk Review: My Experience with KP & Eczema-Prone Skin. Like this nail journey, that discovery came from trying to find practical solutions to problems I had been struggling with for years.
Thanks for following along, and I’ll see you in the next post!